learn about all things surface pattern design including the creative design process, being a successful creative entrepreneur & stepping into the mindset of a successful designer
welcome to the pattern design blog
blog
The
Categories
Popular
Using Line to Create Texture
Texture is such an important element to consider when creating your surface pattern designs. In the blog post ‘Creating Printed Texture Techniques’ we discussed using printing methods to create texture but there are an infinite number of other ways, textural effects can be achieved.
Using line to create texture:
Line is such an important element of a design and can be used to express shape, contour, texture, and tone. When using line to create texture the possibilities are endless.
Let’s have a look at some effective ways you can use line to create texture in your designs:
1. Linear Hatching:
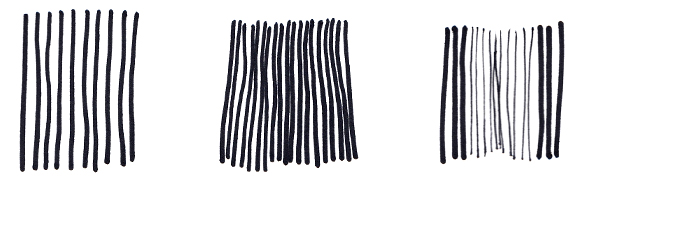
Linear hatching is created by drawing parallel lines next to each other that don’t overlap. By varying the distance between the lines you change the value or depth that is created within your drawings. The closer together, the more solid and darker the area will appear. The more widely spaced the lines, the lighter the area will appear. Using thicker lines will also help create a more solid area of colour.
Linear Cross-Hatching examples:
 2. Cross-Hatching:
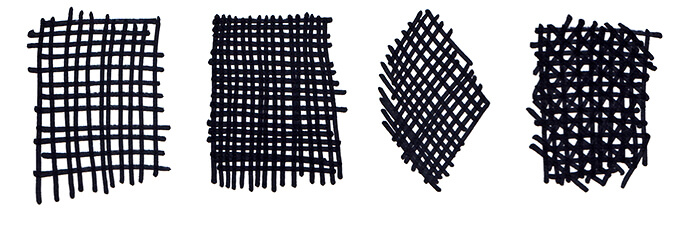
Cross-hatching is created by drawing one set of parallel line, then layering it with a second set of parallel lines at different angles. By varying the angle at which the hatching overlaps you can create varied effects. You can use multiple layers of cross-hatching to add contrast and variety within your design. Just as with linear hatching, you can vary the line thickness and distance between lines to create more solid areas.
Cross-Hatching examples:
3. Contouring:
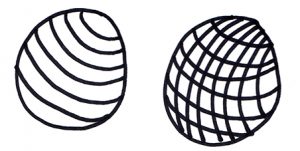
Contouring is created by drawing parallel lines that follow the form of an object. This gives the effect of being 3 Dimensional. By varying the distance and thickness of the lines, solid areas can be created.
Contouring and Cross Contouring examples:
To help you develop your own pen texture techniques I have created a FREE BONUS guide of 20 pen texture techniques. Sign up below to get access.
4. Cross Contouring:
Cross contouring technique allows you to create a 3-dimensional looking object. Start by creating one set of parallel lines that follow the form of an object. A second set of parallel lines is then drawn, which also follows the form of the object but at a different angle, as with cross hatching. Create more depth and value by varying the line width and distance between lines.
5. Stippling:
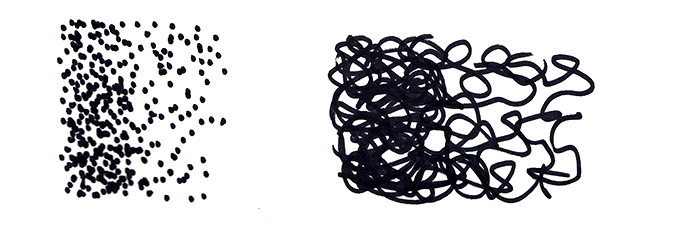
Stippling is created by using tiny dots to create value. The more dots that are clustered together in one area, the more shadow and depth will be created. The further the dots are apart, the lighter the area will appear.
Stippling and Squiggling examples:
6. Squiggling:
Squiggles are created by loosely scribbling lines on the page. By varying and layering the scribbles, you can build up areas to create depth. Try changing the direction of the squiggles to add interest.
7. Patterns:
You can create texture by drawing patterns. This is more a decorative approach to drawing and can be created by choosing a decorative shape and repeating it. The same principals apply in regards to creating depth and value. Vary the amount and size of the pattern to determine how solid the area is.
Patterned texture examples:

Get out your pencils or art line pens and start experimenting with the different sort of textures you can create.
Don’t dismiss using multiple methods of texture together. You could try adding some line work to printed textures. There are no rules so take the time to explore and experiment. Sometimes the best textures are found by accident!
P.S. Don’t forget to get your FREE download of Bonus pen texture techniques
Want to create another revenue stream by turning your art into surface pattern designs?
Get the free guide
Get my FREE Surface Pattern Design Starter Guide